How to use RockTape
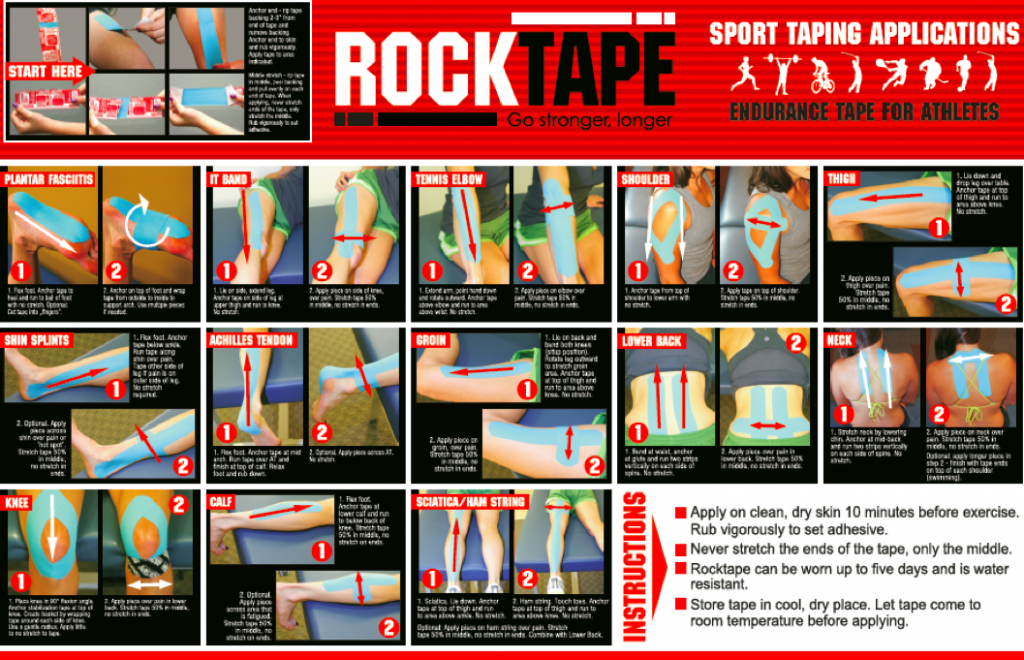
RockTape’s medical director explains how to apply tape to help banish those little running niggles we all get every now and again. On race day, RockTape will be in race village on hand to tape up any niggles you might have.
Simple RockTape Applications for common aches and pains
A lot of folk involved in kinesiology taping will tell you that tape should only be applied by a super-special, highly trained, jedi tape ninja. (Actual title may vary). They will discourage athletes and members of the public from even attempting to self-tape. I don’t really agree with any of that – and bear in mind I am physiotherapist, tape instructor, and tape company medical director!
I think that in many situations, many people can and should consider self-taping. However, there are some caveats and exceptions that I will mention. First and most important: if you have a pain that is any of the following you should see an experienced, competent therapist/medic.
- You have a pain you rate as strong or severe (on a scale of 0-10: 6 or above)
- You have a pain which doesn’t stop or become mild (under 3/10) in any position
- You have a pain which is worsening despite resting it.
Self-taping is best suited to those little niggles, aches and pains. The ones that don’t exactly stop you in your tracks but nonetheless stop you moving freely, playing your sport, standing at work. If you are anything like me, and 95% of the world, you know the kind of niggles I mean.
Now before you grab a roll of RockTape and get sticking there are a few things you need to know to ensure you get a safe, effective, lasting application.
THE GOLDEN RULES
- Round all ends of tape: This is not just a cosmetic thing to make your tape look sexy and cool (although it will help with that). The real reason is to remove the sharp edges which can easily catch on clothes etc.
- Apply ends of tape with 0% stretch: Important one this. In order to stop the tape popping off when you move, or worse irritating your skin, make sure that the last few cm of tape is applied with no stretch at all.
- Avoid handling the glue side of the tape: There is no need to put your fingers on the glue side of the tape, every time you do you leave a little grease behind and weaken the glue. It’s not the end of the world if you do; but try to avoid it.
- Rub tape all over to activate: When you lay the tape on your skin it will look and feel like it is well stuck. But unless you rub it all over it will easily lift away from the skin. By giving the top side of the tape a really good rub all over you create a little friction and cause a chemical reaction in the glue making it stick really well.
- To watch a little video of these tips see here: http://www.youtube.com/watch?v=WIbmiaNBKsk
SIMPLE SELF-TAPING
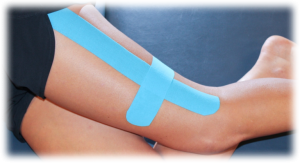
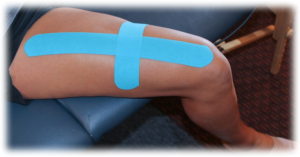
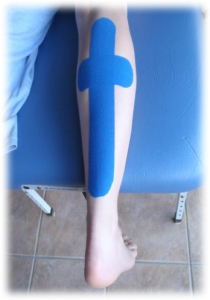
This is our X marks the spot application: it’s a really easy, simple method that can be used to treat loads of aches and pains in just about every body part. It takes just 3 simple steps:
- Put the tissue on stretch
Get your body into a position that stretches the muscle, tendon or joint that you want to tape. This is usually pretty straight forward, if in doubt just find a position that stretches the skin tight. The chances are this will also have stretched the tissue under it. What is really important is that as you apply each piece of tape you are in this stretch position. - Apply fibre tape
The tape goes on in line with tissue fibres. Apply one end first (with no stretch at all on the tape). Peel the backing paper away and lay the tape without adding or subtracting stretch. Lay the final few cm with no stretch at all - Apply decompression tape
This tape is applied perpendicular or oblique to the fibre tape. The 2 bits of tape should cross directly over your sorest spot, band-aid/plaster style with the paper torn in the middle, the tape stretched 40-80%. Lay each end with no stretch at all
That’s it! Rub the whole thing thoroughly all over to make sure it’s well stuck. It takes about 20 minutes to reach full adhesion, so make sure you wait that long before you get too vigorous with your movement!
You can also find a bunch of ‘how to’ video clips here: http://rocktape.net/how-to-use.html
Here are some examples:


